______

Click here to go to this week's Flutter By Wednesday Challenge!

Can you help make a little girl smile?? Please read my post HERE!


Monday, November 30, 2009

Whew, I can tell you all a secret!!

I guess it's not so much a secret anymore.....hehehe....check out this post!
I'm still just so flattered that they would ask me and so very excited to share with you the new releases!!
I'll start sharing with you tomorrow (Wednesday) so be sure to check back!!


Brrrr....

I forgot how cold my craft room gets in the winter...there's no heat in here. Brrr, just call me Rudolph or Frosty!
Anyhoo, several of you asked for an update on the snow...
It has snowed, sleeted and rained off and on all day. Now it is just snowing and starting to stick. Of course it's too dark and cold for the kiddos to play in it so hopefully some of it stays until the morning!!
Here's some photos from earlier this afternoon and a bit ago. I always love seeing the palm trees with snow! LOL!


Snow Day

Living in the desert, we don't see snow that often. Sam and I miss it but I have to admit, I don't miss shoveling the walks or driving in it. I do really miss playing in it though.
We've lived here for about 4 years and in that time we've had snow maybe 3 or 4 times. Only a few of those times was it on the ground long enough to play in.
So you can imagine how excited my kids are that today there is snow in the forecast....around mid-day...so there is a possiblity of a snow day!! I truly hope it snows at least a bit or they will be so disappointed.
With that on my mind I thought that MFT's new Pure Innocence Snow Day would be the perfect image for my card today. 
As I was looking through my "saved" challenges looking for a sketch, I realized this card also qualifies for this week's Saturday Spotlight with Hidden Potential-SSHP09, use an image with a hat. I also used an older MFT SCS sketch, MFTSC77.


supplies:
What I did:
I stamped my image onto my cardstock with memento ink and colored her with copics. I used my nesties to cut out the image and then sponged the edges before removing the die. I picked out my papers, which was a challenge for this color of purple/violet. I embossed both the white cardstock base and the light violet piece with my cuttlebug embossing folders and then sponged ink over them both lightly. 
I used punches to punch out the squares of designer paper and snowflake. I finished the card by adding some glitter for the snow, a few embellishments and touches with my copic glitter pens. I decided I wanted to finish the inside of the card too. I used the negative space of the snowflake punch to sponge some snowflakes and then stamped the sentiment. Hard to photograph as it's very light.

Sunday, November 29, 2009

Where do these weekends go?

I don't know what happens, I blink and the weekends are over! LOL!
I started to play along with several card challenges this weekend but nothing was working as I planned so instead I shifted gears and worked on scrapbooking. I miss scrapbooking so much. It was my first love and I still just get such happiness from working with photos, paper, die cuts, stickers and such. 
I think that will be one of my new goals in the new year, try to learn to balance card making and scrapbooking. I also find if I take a break from the card making, the ideas sure do flow!!
I took a few days off from commenting too.Sometimes that in itself can be overwhelming. It won't happen often though as I just love leaving comments for you all!!
Anyhoo, I'll be back this week with lots of projects and a special announcement too...hehehe!!
Here's the layouts I finished this weekend~


Friday, November 27, 2009

Verve Blog Party Challenge #1

I've been an admirer of Verve Stamps for quite a while. Finally on my last shopping spree for my Christmas presents I ordered a couple to get "My Verve On". LOL!
I was pleased today when I was looking at my google reader and I saw that Verve was having a Thankful Hearts Blog Party to release their new sets. I thought it would be fun to play along with a few of their challenges, starting with Challenge #1--a color challenge.


Here's what I came up with for this fun color challenge~


supplies:
What I did:
This was such a different process for me on this card, I just hope it works! I started by cutting out a SU top note in black. Then I sort of fidgeted around with things until I figured out a layout. I cut a second top note die out of white and cut around the edge of it on the perforated lines. I used my corner rounder on the old olive piece.
I used my flowers #3 Sizzix texturz plate for the embossing on the old olive piece and then sponged more old olive ink on top of it to make the embossing a bit more prominent. I also sponged old olive on the white top note die.
Next I stamped my sentiment in basic black. I stamped the butterfly next to the sentiment in old olive. Then stamped another one in bermuda bay that I cut out and layered over the old olive one. I added a few of the swirls in bermuda bay to the corners. To finish it off I added a few embellishments. Gasp, as I was finishing I realized there wasn't any sparkle! LOL! So I added a few touches to the butterfly with my clear copic glitter pen.

This was a fun card for me and a challenge as I didn't color anything!! Really a rare thing for me but I liked it!!

More shopping themed cards

I've been wanting to ink up some of my bellas lately so I figured it would be fun to get a few of the shopping ones inky for today.
I had the leftover cardstock from the card in the previous post sitting on my desk and thought it would be a fun little card. I thought it would be a scrapling, but when I looked that up, mine is alot bigger than a true scrapling which is only a mere 1 1/4 x 4 1/4.


supplies:
What I did:
I stamped my bella with memento ink onto my cardstock. Then I masked her feet and stamped one of my essential ovals under her feet so she'd have something to stand on.
One thing I do, is that once I make a mask for an image, I save it so I don't have to do it again. Here's my "mask" clamshells...hehehe..


Once she had something to stand on I colored her with my copics. I cut her out using my nesties and inked around the edges. I found some more of the Frutti Fusion scraps as I think it's such fun paper with these happy colors. I used my EK Success border punch on the edge of the card. Which I wasn't paying attention and didn't line up....twice, I finally just left it (covered it with the flowers) and moved on. I adhered the paper, added sparkle with my copic glitter pens and some stickles, then finished the card by picking out a few embellishments.

I might have another bella card later but if not, hope you enjoyed my shopping themed day!


Black Friday Shopping

I'm wondering how many of you shoppers were up and at em' early today? Not me. I avoid the stores like the plague on this day! Way too many people for me. I'll gladly pay the regular price for things, thank  you! LOL! But for those of you who went shopping, hope it was a great day full of lots of great deals for you.
I thought it would be fun to have all my cards today deal with shopping. 
Starting with one of the new Elisabeth Bell for SCACD Sampler Edition 2 images, Fashionista!


supplies:
What I did:
I started by stamping Fashionista with Memento ink onto my cardstock and coloring with copics. I am the farthest thing from a fashionista so it was fun to color up this gorgeous girl! LOL!
Once she was colored I added some accents with my copic glitter pens.
I wanted to keep this a fairly simple card, plus I wanted to try out my new sizzix texturz plates, so I just embossed a piece of white cardstock ( I couldn't get it to show in the photo), then chose a simple layout and simple embellishements. I doodled around Fashionista and the white embossed cardstock.

Next up we have Melanie! I think she's running off to the next sale!


supplies:
What I did:
I started by stamping Melanie onto my cardstock with Memento ink and then colored her with copics. I added azure smooch to her hat band and garnet Inspiration paint to one of her bags. I added stripes to the pink bag with cotton candy stickles. I cut her out with my nesties and then struggled forever on how to finish the card! LOL! I found a scrap of TAC paper that worked nicely, used my scor-bug for the embossing lines, added some final touches (like sponging around the edges of the image and adding embellishments) and she's ready to go shopping!


Since the kids and I aren't going anywhere, I'll probably have a few more shopping themed cards sometime throughout the day--hope you stop back by!!
Have a happy day!


Thursday, November 26, 2009

Sparkly Thursday #1- Sparkly Fluff

I thought about waiting to do this since today is Thanksgiving for us in the USA, but then I wanted to get this series started so I decided to go ahead and post it. Hope everyone has a wonderful day, and if you celebrate Thanksgiving, enjoy and be blessed!

This isn't really a "tutorial" as much as it is just telling about the product and showing some ideas.

So let's get started!! The sparkly product today that is in the spotlight is Sparkly Fluff.  I found this review on the product: Craft Critique review.
My own little review is that I love this stuff!! At first I was a bit skeptical as I had lots of fun flock. I mean, that's what I thought this was like. Which in a way it is similar, as it's fuzzy but for us sparkle lovers the extra WOW is in the added little bits of sparkle in Sparkly Fluff.


I only have 3 colors right now but in doing this Sparkly Thursday, I have ideas for lots more of the wonderful colors that are available!! How fun would the gold and platinum be on a Christmas tree die cut or stamp as the garland?? or Appletini green as some sparkly grass for a fairy?? the ideas are endless and so many colors to choose from!!!

I'm sure everyone does things differently but here's how I use this wonderful, sparkly product!


Stamp and color your image. I chose not to color this image so you could see the steps better.


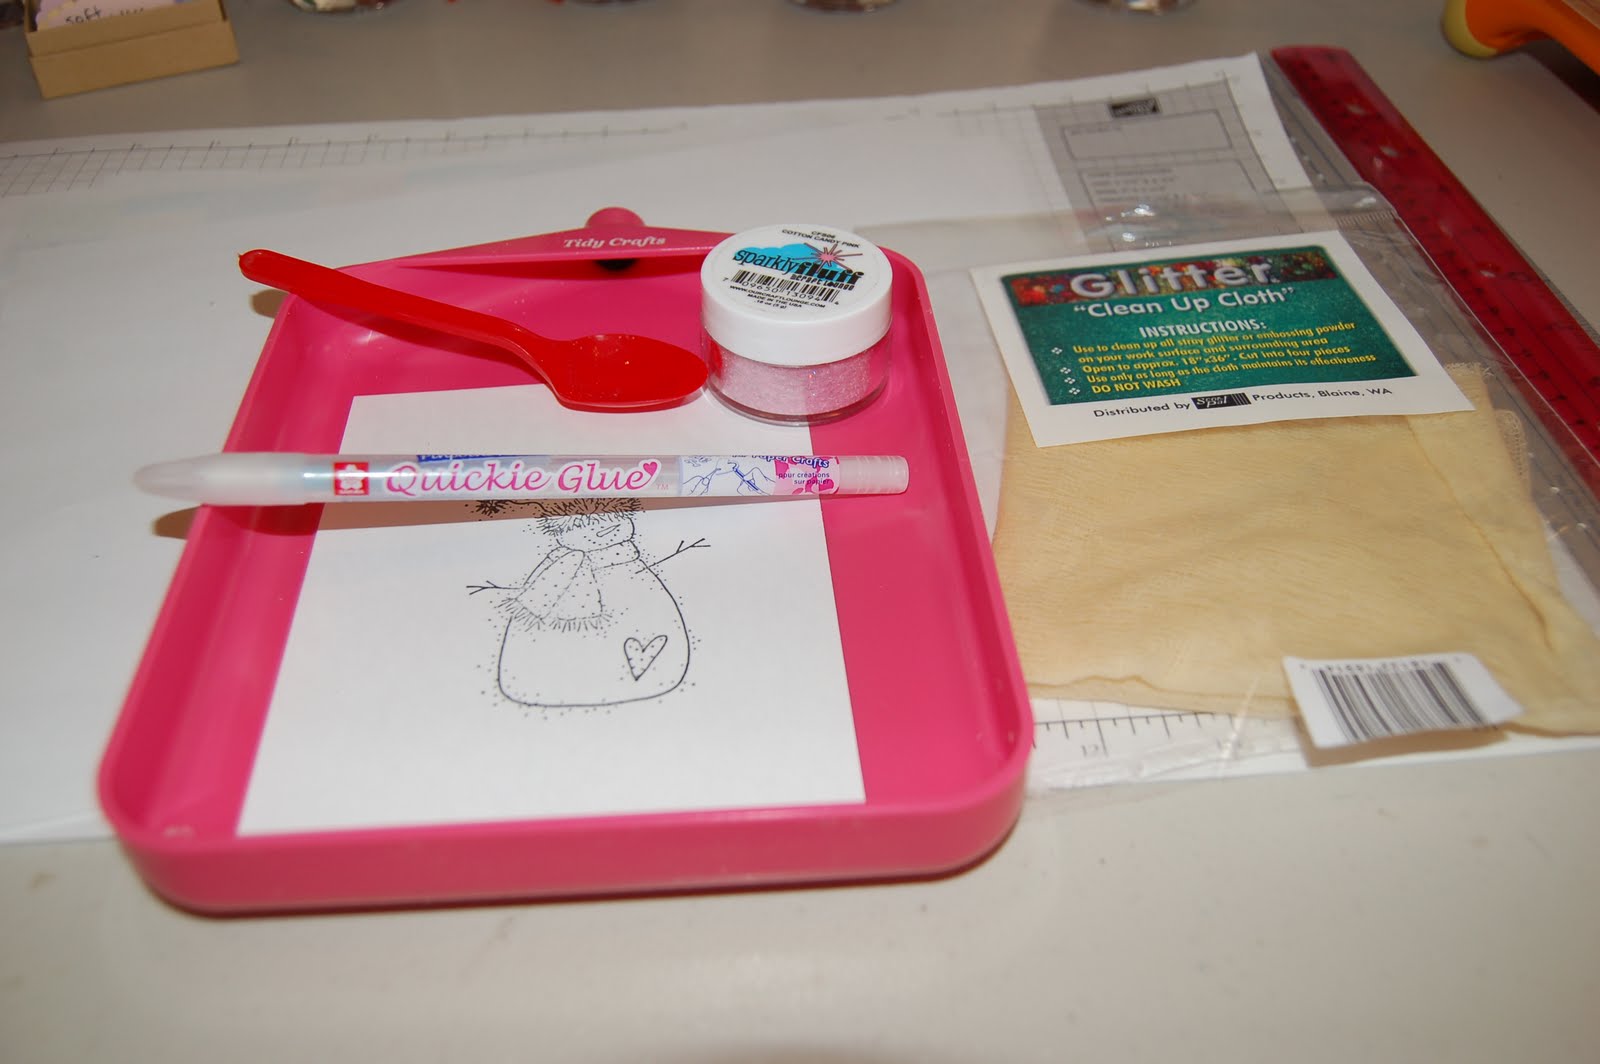
Collect all the supplies you'll need: quickie glue pen (love this pen as it is so easy to work with), a tidy tray or if that is not available a tupperware container or even an empty clamshell that stamps come in work great. I also use a little plastic spoon (I stole this one from the kids lunchables, but any little spoon would work) to help apply the sparkly fluff as that way I tend to control it better and not wear quite as much. I also never do a sparkly project without my glitter clean up cloth!!


Apply your glue to the areas you want to use the sparkly fluff. I wanted to do the hat trim. I usually do a small area at a time. See how the glue is blue when it's wet--it dries clear.


Next take a spoonful of sparkly fluff--I used cotton candy pink--and pour it onto the glue spot.


Take your spoon and tap it down a bit, then I pour the excess back into the container. Then tap your cardstock a bit to get all the stray pieces off.


There you have it..a sparkly fluffy hat pompom! Continue these steps until you have the effect you like.


When done, use a piece of the glitter clean up cloth and clean up your tray, if using a container, you can empty the container of sparkly fluff in there and leave it if that works for you. I've started doing that with my flower soft.
    And that's it! Easy peasy! Below are just some images that I colored and added sparkly fluff to so you could maybe get some ideas and inspiration!! Thanks for coming by and I hope that you enjoyed my first Sparkly Thursday! Come back next week for Glitter!!


    Cotton Candy Sparkly Fluff on the hat and scarf trim.


    Baby Boy Blue Sparkly Fluff used on this cuties little jammies.


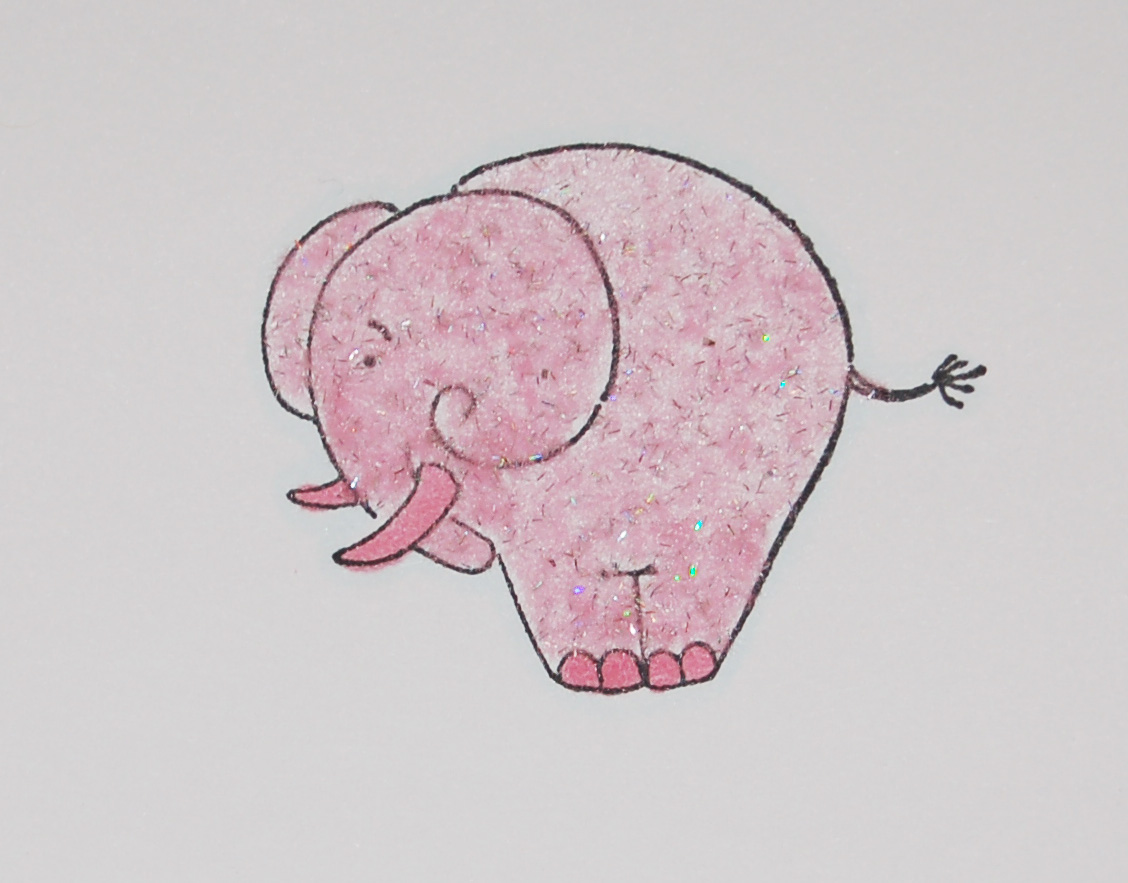
    Cotton Candy Sparkly Fluff for a fuzzy, sparkly elephant!


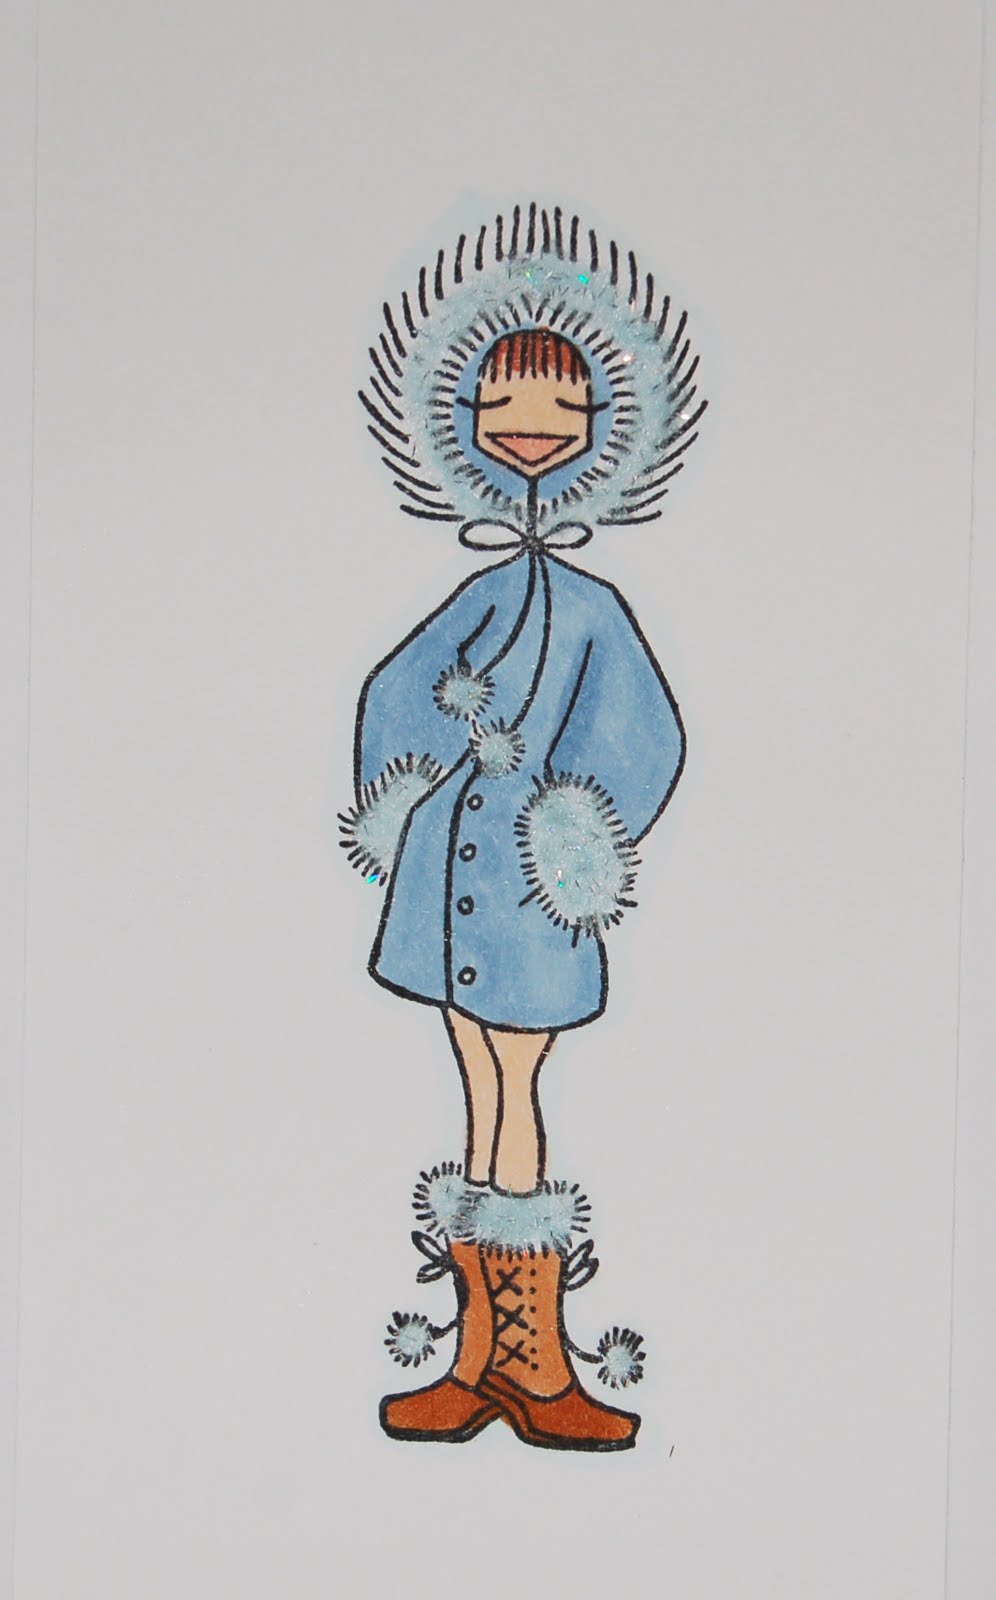
    Baby Boy Blue Sparkly Fluff for Snowbunnybella's trim!


    Hard to photograph but I used Sugar Sparkly Fluff for Miss Anya's bubbles!


    Wednesday, November 25, 2009

    Blog banner and button designer??

    Does anyone have any recommendations for someone to make a blog banner and a blog button/charm?? Thanks!!

    LinkWithin

    Related Posts with Thumbnails