Showing posts with label Crafter's Workshop Template. Show all posts

Saturday, June 6, 2020

Oceans of Birthday Wishes

Another mermaid to share today!! This is one of the fabulous mermaids from Some Odd Girl called Puffer Cone Mermaid! I just love her expression!!

I used a stencil and inked up the background. After I got it finished I thought it was too bold for the fun Mermaid and her Puffer Cone so I added some vellum over top to mute it a bit.


I embossed the sentiment (I think I maybe should have done a darker color but I do like that it's sort of hidden with the white) and then added a few sequins to finish the card off.


Thanks for stopping by and I hope you have a simply wonderful day!

Stamps~ Some Odd Girl~digi~Puffer Cone Mermaid, Craftin' Desert Divas~Mermaid Lagoon,
Ink~ SU Pineapple Punch, SU Grapefruit Grove, SU Highland Heather, VersaMark
Cardstock~ vellum, SU Calypso Coral,
Designer Paper~
Other Goodies~ copics, Crafter's Workshop Mini Fish Scales stencil, MFT A2 Stitched Rectangle STAX set 1, sequins, white embossing powder, Spectrum Noir Sparkle Pen,


Saturday, February 2, 2019

Nerds Rule the World

In the Kraftin' Kimmie Facebook Group they are having a Krafty Friends party so I thought I'd try and play along with at least one challenge. The first challenge is to make your own background. I don't own any of the Kraftin' Kimmie stencils or inks so I used what I have and paired it with a Kraftin' Kimmie stamp set, Girl Power.

I used some different colors than I normally do and love the end result!


Have a wonderful, happy day!

Stamps~ Kraftin' Kimmie~ Girl Power,
Ink~ Distress Oxide inks~ Wilted Violet, Twisted Citron, Spiced Marmalade, Memento Tuxedo Black, SU Gorgeous Grape,
Cardstock~ misc. white, Copic Xpress-it, SU Gorgeous Grape,
Designer Paper~
Other Goodies~ The Crafter's Workshop Mini Numbers Collage stencil, MFT A2 Stitched Rectangle STAX set 1, buttons, bakers twine, glossy accents, glitter pen,

Monday, March 19, 2018

Enjoy Today

I had fun with this card and decided to try another version of it. I really do love how easy the Oxide Distress Inks blend! They are so fun, I hope to use them more!

I found this cute little Wild Sprout Amber in my digi folder already printed out so I decided to color her up for this card. She turned out pretty cute with her colorful hair!


Have a super fabulous day!

Stamps~ The Greeting Farm~digi~Wild Sprouts Amber, SU Eastern Beauty,
Ink~ Oxide Distress Inks, SU Poppy Parade, 
Cardstock~ SU Dapper Denim, SU Crushed Curry, SU Island Indigo, SU Watermelon Wonder,
Designer Paper~
Other Goodies~ SU Layering Circles Framelits, Crafter's Workshop Mini Cosmic Swirl Template/Stencil, copics, SU Banner Triple Punch, Doodlebug Matte Sprinkles Bright Assortment, Spectrum Noir Sparkle Pen,

Thursday, August 30, 2012

Lovin’ this new die!

Oh my! I knew I would love the new Dies by SCACD but I really, really am LOVING them! Today I decided to play with the new Sun and Moon Statement Corner. I love that it’s bigger than the normal corner die and such fun details in it!
I started by cutting out one of the corners in an orange-ish color cardstock. Next I painted some Luminarte Honey Amber Silk onto it and let it dry. Once it was dry I added touches of Luminarte Solar Gold Silk to create some interest.


For the background of the card I used a Crafter’s Workshop Template- Mini Star Shower, and used the same Luminarte Silk colors as I used on the Sun and Moon Statement Corner.


I thought these were the perfect elements for Sunny Eyes from Susana Loves Stamps to go with so I stamped her in Memento Tuxedo Black ink and colored her with copics and then cut her out.
To finish the card I added some stickles and a few touches of Smooch Illuminate.

This card was so much fun to create! I can’t wait to play with more of the new Dies by SCACD!!

copic colors- E000, E00, E21, R30, R20, E35, YR20, Y20, B05, B02, YR04, YR07, YR09, YR18, R05, R08, Y17,

Tuesday, July 17, 2012

Spray Fun

I know, I know--very strange title today but I thought it very appropriate because that’s what I did…had fun with sprays/mists/spritz. Just thought I’d share some of my fun with you!

DSC_0001

First I got out all my sprays/mists/spritz which consist of Dylusions Ink Sprays {these are quickly becoming a favorite!}, Maya Road Mists {totally gorgeous mists}, Smooch Spritz {fun spritz--mine are a bit messy as when we moved over a year ago a few got broke but I saved what I could) and Tsukineko Psst Shimmer Spritz {another favorite}--all of these I got at SCACD!!

For the first project I took out my Dylusions Dotted Flower Stencil and some white cardstock and some scrap paper. I taped my stencil to my cardstock and then covered up the middle section of the stencil with some scrap paper as I didn’t want that part to be sprayed. Back tracking a bit, I am doing this on my craft mat which cleans up easily and then my hubby cut a box for me so I’d have a “spray shield”.

DSC_0003

Next the fun comes, randomly I just sprayed the Dylusions Ink Sprays in Bubblegum Pink, Vibrant Turquoise, Crushed Grape and Lemon Zest onto the area with the stencil. I let it dry (shhh…I might have speeded it up with a heat gun) and then removed the scrap paper and stencil. I’m a bit OCD about my stencils being clean so I also cleaned it up with ScraPerfect’s Best Cleaner Ever. I love how it came out!! Now I have a nice corner for a project!

DSC_0005

DSC_0007

DSC_0008-1 

DSC_0009

Next I wanted to use the Maya Road Mists. I placed my cardstock down, adhered my mini Fish Scales Crafter’s Workshop Template and then misted with the Maya Road Mists in Amethyst Metallic Mist and Iridescent Pearl Mist. Repeated the process above..waited for it to dry and then took the template off-cleaned it,etc. So shimmery and sparkly!

DSC_0011

DSC_0014

DSC_0016  

For the Smooch Spritz I just randomly spritzed the cardstock to create a shimmery background for future use. (the photos don’t show it well but it is really shimmery)

DSC_0024

Finally for the Tsukineko Psst Shimmer Spray I wanted to try something different. I took a darker cardstock and then an embossing folder (isn’t it pretty! It’s one of the new ones at SCACD from Couture Creations called Serene) and sprayed a mixture of Copper, Frost and Gold onto the embossing folder and then quickly ran it through my Big Shot. Gorgeous end result!! and super easy!!

DSC_0019

Hope this has given you a few ideas on how to play around with some of the fabulous sprays/mists/spritz that are out there. So much fun and the possibilities are endless--for backgrounds, as a card front, chipboard, in art journals/mixed media…and etc. and etc.!

I’ll have projects using all these soon so stay tuned!

Friday, March 30, 2012

Susana Loves Stamps Release Day Hop!!!

Yippie!! It’s release day! You know I love release days!

Susana is launching some new branding for SCACD Exclusive Stamps in general and will now be calling ANY of them Susana Loves Stamps. To be clear it does not mean she personally designed what you are seeing but she did have a part in bringing it forward. Look out for more Susana Loves projects in the works.

Susana Loves Stamps presents Eyes of Dreams Collection and Eyes of Beauty Collection! I {heart} these stamps! So fun and fabulous!

I’m the first stop on the blog hop today but if you get lost along the way, you can find a complete blog hop list on the store blog, Follow Your Heart.

Today I’m showing two of the new stamps, Sunny Eyes and Classic Eyes. Both are such beauties and so full of elegance and class!

I also had fun using Crafter’s Workshop Templates and Luminarte Products on this Sunny Eyes card! So fun! Seriously, if you haven’t tried the silks and primary elements micas--do it!!

sunnyeyesa

sunnyeyesacu2wm

sunnyeyesaside  

Classic Eyes is just so elegant! I had fun paper piecing her dress but can imagine it done so many classy ways!

classiceyesa

classiceyesacuwm

classiceyesaside  

Now you should hop on to Elaine’s blog! and then get shopping as these stamps are available NOW to purchase at SCACD and also for our International Friends at Quixotic Paperie!

The little details~ Sunny Eyes, Memento Tuxedo Black, copics, Basic Grey Picadilly, nestabilities, copic multi-liner .08, Flames Crafter’s Workshop Template, Solar Gold and Honey Amber Luminarte silks, CTMH retired ribbon, pearls, stickles, Classic Eyes, Prima Fairy Flora, copic multi-liner .03, Tattered Rose Distress Ink, SU Lavender Lace, Certainly Celery and Pale Plum ink, Petaloo flower, Memory Box Elegant Scrollwork die, Kaisercraft pearls,  

Friday, March 9, 2012

Let the creativity flow…

Have you ever been in a creative rut? That’s what has been going on with me lately. I’ve been blogging for years, making cards for years, the same kind of things..for years.  I thought a few breaks would help and in a way they did but I still just felt blah when it came to creating.

I have been challenged to improve my coloring skills and that has helped a little bit. But I still felt in a rut. Crazy thoughts crossed my mind like I should stop blogging, stop creating. But I knew in my heart that wasn’t going to happen, I love to create.

And then Susana got some new products in. And I rolled my eyes as they are more “mixed media” type products. Not for me I said. As I’ve always said about mixed media/altered/Tim Holtz type products/styles-not for me.

And then I tried a few of the new products.

I can’t explain the sparks that started flying in my brain. The happy giddy giggles I use to get that started to come out.  The desire to create and play and create came back with a force.

So instead of continuing to label myself..I gave myself permission to embrace it and let it flow. I even signed up for an online class with Tim Holtz!

I’m excited! and the biggest thing is that I want to create again! I may not fully embrace the total mixed media/grunge type style but I can find my own fun, Danni style!

So I hope you’ll stick with my on my new creativity journey!

Here’s my first project using my most favorite glitter paints and templates.

rosea

roseasparklea little better view of the sparkle

roseaside  

The little details~ Crafter’s Workshop Fish Scales Template, DecoArt Glamour Dust Ultrafine Glitter Paint, Simply Gorjuss Rose (I don’t see her at SCACD where I got mine but there are several other Gorjuss Girls to choose from), Memento Tuxedo Black, copics, flower, CTMH retired ribbon,

Copics~ E000, E00, E11, R30, R20, E23, E25, E27, E29, BG05, BG02, BG01, V12, V15, BG07, V91, V93, V95

Saturday, February 25, 2012

The Travelers

I’ve been wanting to use the Aspen Tree background that I created in THIS POST so today I sat down to figure out what to create. I was so excited when I saw The Travelers in my stamp catalog! How perfect!! So I got busy and this is what I ended up with~

thetravelersa

thetravelersaside 

The little details~ The Travelers, Memento Tuxedo Black, copics, Crafter’s Workshop Aspen Tree Template, SU Bashful Blue ink, ribbon, Kaisercraft rhinestones,

Tuesday, February 21, 2012

Crafter’s Workshop Templates

My DT Sister, Lorraine has a wonderful tutorial on the SCACD store blog, Follow Your Heart, on using stencils/templates~ HERE~ so I thought I’d get out my newest Crafter’s Workshop Templates and do some playing.

Here I sponged ink onto the Aspen Trees. Won’t this make a pretty background? Just think of how striking it would look with darker, rich colors like a deep purple or even a dark blue or even black!

aspentreea

For the Palm Tree I decided to try multiple ink sponged on. Again, what a neat background!

palmtreea

For my last one today I took the Flames and traced them with a copic multi-liner .03 pen and then colored them in. So fun!! (I forgot what paper I had used and it was not copic friendly so I used my SU markers which still gave a neat effect, I thought)

flamea

So whatcha’ waiting for? Go get some stencils/templates and have fun!!

Wednesday, February 8, 2012

So many talented crafters…

I am constantly amazed at all the super talented crafters out there! Wow! So much inspiration! Tonight I am in awe over two of my SCACD Sisters, Lorraine and Alex…have you seen their works of art? No, well, check them out~

See Alex’s HERE! and Lorraine’s HERE!  I’m a pretty simple card maker. I try some new things but mostly stick to coloring an image and putting it on a card. I love seeing the way others use all the products out there and these are just too fab to not mention!

I know that I’m making a HUGE wishlist of the new Crafter’s Workshop Templates that Susana got in..have you checked them out? You just have too…soooo many totally awesome ones with so much potential!!

I’m off to see what I can create now that I’m inspired..see you soon!!

Sunday, August 28, 2011

Friendship Rose

I just had to ink up another one of the wonderful Fall Flora Fairies that were released on Friday! I {heart} them!!

Today I’m sharing Friendship Rose with you. Isn’t she a delight? For some reason I picture her talking with a southern drawl and being oh so polite and lady like.

Have you ordered your fairies yet?? You know you NEED them!! Be sure to look around Susana’s store too…I know she’s been busy uploading lots of new things! and don’t forget about the blog candy on the store blog!

I tried something a bit different with this fairy. I sponged on a background of sorts using a Crafter’s Workshop Template. Once I had it sponged and while I still had my mask on the fairy I went over the white spaces with shimmer chalk to fill it in some (Belle came in while I was chalking and she said, wow, that’s alot of sparkle!) LOL!!

Since I had so much going on with my little scene, I just kept the card super simple. I spritzed my white base cardstock with Maya Road Mist to add just a bit more sparkle to the card. I also used my Cricut for the border and then the butterflies are Make It Crafty Butterfly Leaves chipboard--oh my word are they so gorgeous, such fabulous work in chipboard! I painted them with my favorite DecoArt Glamour Dust Ultra-fine glitter paint.

friendshiprose1

friendshiprose1side

You can see the shimmer and sparkle in the next photo~

friendshiprose1shimmer1 

The little details~ Friendship Rose, Memento Tuxedo Black, copics, SU inks, shimmer chalks, Maya Road Mist, Cricut Storybook cartridge, Make It Crafty Butterfly Leaves, DecoArt Glamour Dust Ultrafine glitter paint, stickles,

Photobucket

Thursday, August 11, 2011

Art Journaling

**Warning--LONG post ahead**
Who knew that two words could gather so many emotions in me! On the one hand I’m TERRIFIED to try this but on the other hand, I’m so intrigued that I can’t stop thinking about it and researching it and looking at it.
So I finally took a first step--hehe, a very baby first step, and asked about it on Facebook, because you know you can find out about everything on Facebook. LOL! I was so pleased at the discussion that ensued and also happy to hear that there were others who were like me, scared to start but scared not to start!!
Here’s a few places that got that spark going for me~
I think this appeals to me so much because there really are no rules! It allows you to let your inner self out, to do what you want with those hoarded awesome supplies.
As a child I would doodle, nothing that I felt was art worthy but it was fun. I also use to take magazine after magazine and cut out pictures and make collage after collage! My Great-Grandmother was always so supportive of this, always telling me how nice they were, LOL! Ohh, and I just remembered mosaics..I would spend hours cutting out little squares and gluing them down to make pictures..hehe!
After much thought and then throwing caution to the wind, I decided to just jump in and get wet with this art journaling!
I truly hope it is a “no rules” kinda thing as I am going to use the supplies I have at home to start as <gasp> I’m trying to watch my spending. I gave away all my paint when we moved and really don’t even want to spend $$ on a journal so I’m just going to get creative with what I can find in this craft room!
So without more babble, here’s my first art journal page--be gentle-- I am using just plain old cardstock and then will put the pages together with rings or a binder or something after I have a few more. I decided to go with an 8x8 size. I chose cardstock as most of what I will be working with are copics, inks, sparkly goodies and maybe a few other mediums but it should work out for now.
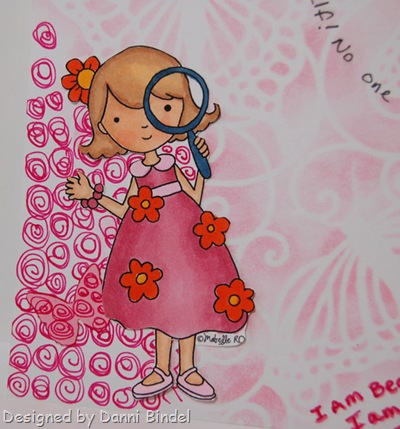
This page actually was sparked in my brain when I saw the uber cute digi, Searching, from Whimsy and Stars Studio-Mabelle RO. Thought it would be the perfect cover/intro to my art journal as I seem to always be searching for who I am and what I mean to the universe!


I have to say, the hardest part for me is the randomness of it all. I am such an order freak that it was so hard to be random..but I can see that I might start to like it..hehe!
I really had fun with this and can see an addiction forming as I have tons of ideas rolling around in my head. If I continue, I can see an actual journal would be beneficial along with some other supplies--maybe that will be one of my birthday wishes!
Thanks for sticking with me through this marathon post!! Why not go create something for YOU!!
The little details~ digi-Searching, copics, copic multi-liner, SU markers, Crafter’s Workshop mini flutterby template, SU pretty in pink ink, SU beautiful wings die, Martha Stewart punches, TAC retired Sentimental Shapes and Well Defined Backgrounds, Taffy Smooch, DecoArt Ultrafine Glamour Dust Celebration Pink paint,
Photobucket

Monday, March 7, 2011

Street Corner Josh

I've been wanting to play around with my Crafter's Workshop Templates so I finally took the time to work with one of them!

I used the Bricks template. What fun!! I sponged on my ink and when I was done, voila, a cool brick wall for a background!


When looking through my stamps to use with this fun background, I thought Street Corner Josh from Sparkle Creations Stamps would be perfect! 


The little details~ Crafters Workshop Template-bricks, Street Corner Josh, Memento Tuxedo Black, copics, Palette Burnt Sienna ink, TAC Coffee Talk, dew drops, 

Photobucket

Monday, January 24, 2011

Crafter's Workshop Templates

As I was window shopping---I'll be glad when we have a new address so I can order!!-- I was looking at Susana's store..one of my favorite places and thought I'd see what new Crafter's Workshop Templates she had.

Oh my word!! I love the selection she has! so many possibilities!!

Of course, the Butterfly Meadow stood out to me... don't you think it would make a pretty background??

I was also drawn to the Time Travel...wouldn't that work well with some vintage distressing?

I think this one needs no explanation why I am in {love} with it~ Flutterby


There are so many templates to choose from! Be sure to check them all out when you are shopping at Susana's!! (there are also other brands but I'll share about them another day!! but you can check them out here)

Tuesday, August 17, 2010

Try It Out with a "T" #81

**Please be sure to scroll down for my first post of the day! Thanks!**


Our challenge today is Stencil It! Use either Dreamweaver stencils or Crafter's Workshop Templates on our projects! So many fun ways to use them~ with embossing pastes, micas, Viva Decor products and etc.!

If in doubt, there are some great videos by design team member, Marti to give you some ideas~~ herehere, here, and  here.


Be sure to visit Susana's store blog, Follow Your Heart, to see what the other design team members came up with! I know they'll knock your socks off!!

I started by taking my template, taping one corner to hold it in place (as I knew I'd be cutting it down in size) onto my cardstock and then I sponged on several different colors of ink. 


Next I took my Copic 0.3 Multiliner and outlined all the "white" spaces. (Note-if you do this, cut down your cardstock first so you don't do some of this detailed work for nothing...take my word for it).


After I outlined the entire piece (note, very time consuming but it looks awesome) then I cut it down to the size I wanted for my card. (Would've made more sense to do this first but you know, sometimes we learn as we go!)

I decided on a 5x5 size as I just had to show off how pretty this looks!! Next I attached this piece to some black cardstock, sort of as a base/mat. Next came the really fun part...we all know I love sparkle so I took my Viva Decor Holographic Liner and went to town adding sparkle to parts of this background.


I must admit the next step was the hardest for me...hehe...setting the piece aside and letting it dry. Hehe! Once it had dried, I just couldn't bring myself to cover up any of the flowers so I just added some ribbon and some butterflies with Viva Decor Glitter liner on them as well to make a card. 


supplies:

Wednesday, May 19, 2010

FBW #110

Time for another fluttering challenge with my Flutter By Wednesday challenge! This week we are to use flowers with our butterflies, fairies or angels! Super fun!

Be sure to check out the Flutter By Wednesday blog to see the rest of the teams fabulous fluttering creations!

I had fun with my creation! I started by taking my new Crafter's Workshop Flower Frenzy Template and then took 3 colors of Smooch Spritz and sprayed my paper. There were a few places that ran a bit but overall I thought it turned out so fun!! It's so shimmery in real life!


Once I had that fun paper done, I chose Hula Anya to go with it as I just thought she meshed well with it! I sprayed the butterflies with Smooch Spritz too! The flowers in Hula Anya's hair have a bit of Viva Decor Glitter Liner-holographic- on them...so pretty!


It was fun to do this smaller size card. Pretty simple card but I really like how it turned out!


supplies: